✈️ How To Pack A Suitcase
✈️ The Smart Traveler's Toolkit
Whether you're heading to the beaches of Thailand or exploring cobblestone streets in Prague, these are the 5 travel essentials that seasoned globetrotters and travel editors universally recommend — the gear that makes every trip smoother, lighter, and more enjoyable.
🧳 Away The Carry-On Hard Shell Suitcase
The single most recommended carry-on in the travel world right now. Travel editors and frequent flyers rely on its durable polycarbonate shell, 360° spinner wheels, and built-in compression system to maximize packing space while gliding effortlessly through any airport terminal.
🎒 Osprey Daylite Plus Daypack
The go-to daypack that professional travel bloggers and adventure guides swear by for city explorations and shore excursions. Its lightweight, breathable mesh back panel keeps you cool in tropical heat, while the 20L capacity fits everything you need — camera, water bottle, sunscreen, and souvenirs — without weighing you down.
📦 Eagle Creek Pack-It Reveal Cube Set
The packing organization system that experts credit with fitting 30% more into any suitcase. These translucent, color-coded cubes separate tops, bottoms, and accessories so you spend zero time digging through your bag — universally recommended by professional packers and minimalist travel coaches worldwide.
🎧 Sony WH-1000XM5 Noise-Cancelling Headphones
The undisputed king of travel headphones that flight attendants and business travelers universally recommend. The industry-leading noise cancellation erases engine roar, crying babies, and airport chaos — giving you 30 hours of blissful silence for long-haul flights, road trips, and train journeys.
🔋 Anker PowerCore 26800 Portable Charger
The portable power bank that travel photographers and digital nomads rely on to keep devices charged through full-day excursions without hunting for outlets. With enough capacity to charge a phone 6+ times over, it's the non-negotiable lifeline for capturing every sunset, navigating unfamiliar cities, and staying connected abroad.
Imagine standing on a cobblestone street in a sun-drenched European city, the scent of freshly baked pastries mingling with ancient stone. Or perhaps you’re gazing at a vibrant coral reef in a secluded tropical paradise, the warm sea breeze a gentle caress. These are the moments that etch themselves into the soul, the hidden gems of experience that transform a trip into a profound journey. But before you can lose yourself in the magic of discovery, there’s a crucial first step: the art of packing your suitcase. This isn’t just about fitting clothes into a bag; it’s about curating the possibilities of your adventure, ensuring that every item contributes to the rich tapestry of memories you’re about to weave. A well-packed suitcase is a silent promise of effortless exploration, a prelude to the stories you’ll gather and the cultures you’ll embrace.

Quick Overview
This guide will transform the often-dreaded task of packing into an intentional, almost meditative process, ensuring you embark on your journey feeling prepared, unburdened, and ready to savor every moment. You’ll learn to pack not just efficiently, but wisely, leaving ample room for spontaneity and the unexpected treasures you’ll collect along the way.
- Time needed: 1-2 hours (depending on trip length and preparation)
- Difficulty: Beginner
- What you’ll need: Your chosen suitcase, the clothes and items you wish to bring, toiletries, travel documents, and optionally, packing cubes or compression bags.
Step-by-Step Instructions
Step 1: Envision Your Journey’s Tapestry
Before a single item touches your suitcase, close your eyes and truly feel your destination. Are you wandering through bustling souks in Marrakech, the air thick with spices and the murmur of foreign tongues? Or perhaps hiking rugged trails in Patagonia, the crisp wind whispering tales of ancient glaciers? This isn’t just about checking the weather forecast; it’s about immersing yourself in the anticipated experience. Consider the culture – are there specific dress codes for temples or religious sites? What activities fill your days – elegant dinners, adventurous excursions, quiet contemplation in a remote village? By painting a vivid mental picture of your journey, you begin to understand the narrative your wardrobe needs to tell, the practicalities that will ensure comfort, and the opportunities for cultural immersion that your attire can facilitate.
Pro tip: Create a travel “mood board.” Pin images of your destination, potential outfits, local art, and inspiring scenes. This visual guide will keep you focused on the essence of your trip and prevent extraneous items from creeping into your packing list.
Step 2: Curate Your Wardrobe’s Narrative
Now, bring out every item you think you might want to bring and lay it all out – on your bed, on the floor, wherever you have space. This is your sartorial canvas. The goal here is not just to select clothes, but to curate a versatile, interchangeable collection that supports your journey’s narrative. Think in terms of outfits, not individual pieces. Can that flowing linen shirt be dressed up for an evening out and also serve as a beach cover-up? Can those comfortable walking shoes also work for a casual dinner? Focus on layering – lightweight sweaters for cool evenings, scarves that add a pop of color while providing warmth or sun protection. Prioritize fabrics that resist wrinkles and dry quickly, allowing for easy washing on the go. Every item should earn its place, capable of playing multiple roles in your travel story.
Pro tip: Embrace a cohesive color palette. By sticking to 2-3 main colors (e.g., neutrals like black, white, navy, or grey) and adding 1-2 accent colors, you ensure that almost every top can be worn with every bottom, exponentially increasing your outfit options without increasing bulk. This is the secret to packing light and looking effortlessly chic.
Step 3: Master the Art of Rolling & Folding
This is where the magic of space-saving begins. For most soft, unstructured items like t-shirts, jeans, sweaters, and even some dresses, the rolling method is your best friend. Tightly rolled clothes not only take up less space but also tend to wrinkle less than traditionally folded items, as creases are distributed rather than concentrated. Lay the item flat, fold in the sleeves (if any), and roll tightly from the bottom hem upwards. For more structured garments like blazers, dress shirts, or delicate fabrics, a careful folding technique is better. Consider the “bundle” method for formal wear: lay out your most wrinkle-prone items flat, one on top of the other, with sleeves and pant legs extending outwards. Place a small bundle of underwear or a soft item in the center, then fold the outer garments around it, creating a compact, wrinkle-resistant package.
Pro tip: For items prone to deep creases, like formal shirts, interleave them with sheets of tissue paper before folding. The tissue paper reduces friction and minimizes the formation of sharp creases, keeping your attire looking crisp and ready for that special occasion.
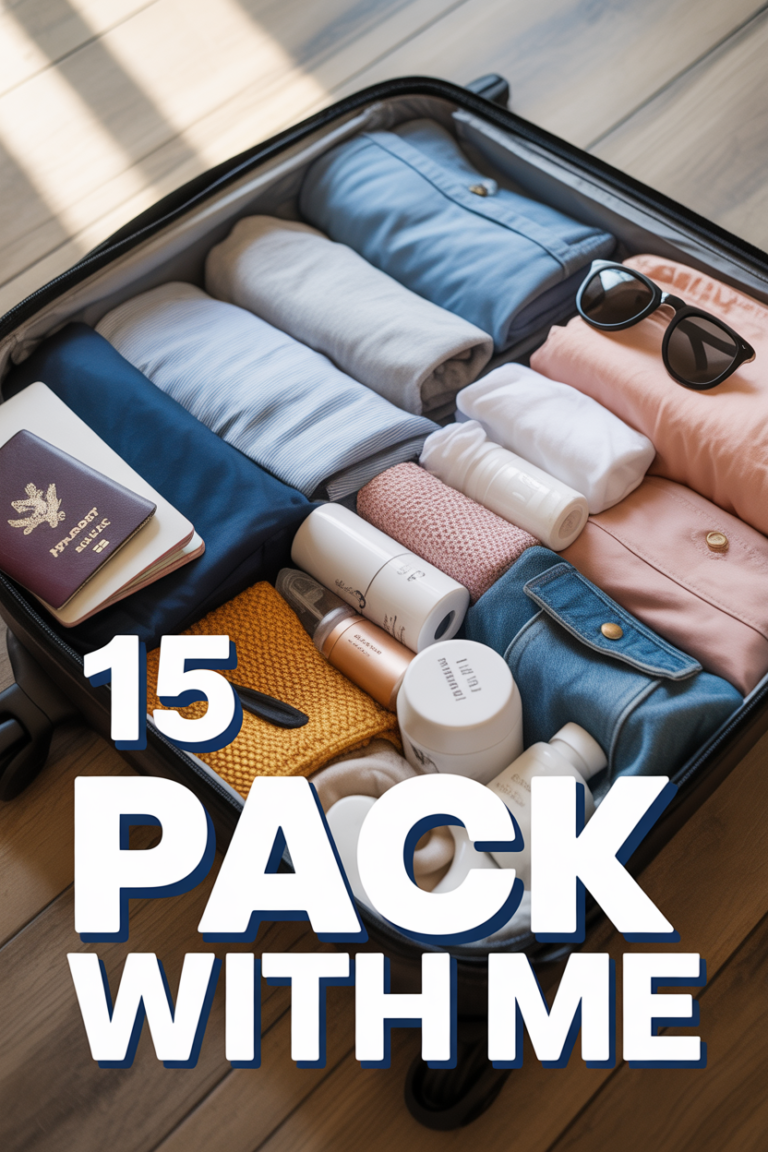
Step 4: Embrace the Magic of Packing Cubes
Packing cubes are not just a trend; they are a revelation for organized travelers. Think of them as miniature drawers for your suitcase, transforming a chaotic cavern into a system of easily accessible compartments. Dedicate different-sized cubes to specific categories: one for tops, another for bottoms, one for underwear and socks, and a separate one for swimwear or activewear. This not only keeps your suitcase incredibly tidy but also allows you to quickly locate items without rummaging through everything. When you arrive at your destination, you can simply lift out the cubes and place them directly into hotel drawers, instantly unpacking without a fuss. They also offer a degree of compression, helping to squeeze out air and maximize space, especially if you opt for compression cubes.
Pro tip: Use different colored packing cubes for different categories or for different family members. This visual cue makes finding exactly what you need even faster, especially if you’re sharing a suitcase or trying to distinguish between clean and dirty clothes.
Step 5: Nestling the Necessities and Nooks
Begin by placing your heaviest and bulkiest items at the bottom of your suitcase, ideally near the wheels. This ensures the suitcase remains stable when standing upright and prevents lighter items from being crushed. Shoes (always placed in individual dust bags or plastic bags to protect your clothes from dirt) go next, tucked into corners or along the perimeter. Fill any empty spaces within your shoes with small items like socks, underwear, or charging cables – every inch counts! Next, layer your rolled clothes snugly into the packing cubes, then place the cubes into the suitcase. Fill any remaining small gaps with soft, malleable items like scarves, belts (coiled or laid flat around the perimeter), or additional socks. The goal is a tightly packed, stable interior where nothing shifts during transit.
Pro tip: To maximize space and protect delicate items, wear your bulkiest shoes and heaviest jacket on the plane. This frees up significant space and weight in your suitcase, allowing you to pack more essentials or leave room for those irresistible souvenirs.
Step 6: Safeguarding Your Personal Sanctuary (Toiletries & Liquids)
Your toiletries bag is your mobile mini-spa, deserving of careful attention. All liquids, gels, and aerosols must comply with TSA regulations for carry-on luggage (3-1-1 rule: 3.4 ounces/100 milliliters per container, in a 1-quart-sized bag, one bag per passenger). Even if checking your bag, it’s wise to use travel-sized containers or decant your favorite products into reusable, leak-proof bottles. Place all liquid containers in a clear, sealable plastic bag (or a dedicated waterproof toiletry bag) to contain any accidental spills. Position your toiletries bag in an easily accessible part of your suitcase, especially if you anticipate needing it shortly after arrival or if you’re checking your bag and want to avoid digging through layers.
Pro tip: Consider solid alternatives for liquids: shampoo bars, conditioner bars, solid perfumes, and toothpaste tablets. These not only save space and weight but also eliminate the risk of leaks entirely, giving you peace of mind on your journey.
Step 7: Crafting Your Carry-On’s Essential Ensemble
Your carry-on bag is your lifeline, a carefully curated collection of absolute necessities that must stay with you at all times. This includes all travel documents (passport, visa, tickets, hotel reservations), any prescription medications (in original containers), valuable electronics (laptop, camera, tablet, power bank), jewelry, and a change of clothes (just in case your checked luggage takes an unexpected detour). Don’t forget items for comfort and entertainment during transit: a good book, noise-canceling headphones, a travel pillow, and a small pouch with essentials like lip balm, hand cream, and a pen. Think of it as your personal emergency kit, ensuring you can comfortably navigate the first 24-48 hours of your trip even without your main suitcase.
Pro tip: Keep a small, foldable tote bag or backpack in your carry-on. This “day bag” can be invaluable for excursions, grocery runs, or carrying souvenirs once you reach your destination, saving you from having to lug your main carry-on everywhere.
Step 8: The Final Curation: Weigh and Review
With your suitcase seemingly packed to perfection, it’s time for a critical review. Lift your suitcase. Is it manageable? Does it feel excessively heavy? Now is the moment to use a luggage scale to ensure you’re within your airline’s weight limits. Exceeding these limits can lead to hefty fees, instantly deflating the joy of your impending adventure. Take a final glance at your packing list. Did you forget anything crucial? More importantly, did you overpack? Be ruthless in this final edit. Can you truly live without that extra pair of shoes or that third ‘just in case’ sweater? Remember, every item you carry is an item you must transport. The lighter your load, the more nimble and free your exploration will be.
Pro tip: Leave a small amount of empty space in your suitcase. This isn’t just for weight management; it’s an open invitation for the souvenirs, local crafts, and culinary delights you’re bound to discover. Allow room for the tangible memories you’ll bring home.
Step 9: Sealing Your Suitcase’s Promise
With everything meticulously placed and reviewed, it’s time to seal your travel companion. Double-check that all zippers are fully closed and secured. Attach a distinctive luggage tag with your name, phone number, and email address (avoid putting your home address for security reasons). Consider adding a colorful luggage strap or ribbon to make your suitcase easily identifiable on the baggage carousel – a small detail that can save precious time and prevent mix-ups. Before you head out the door, take a quick photo of your packed suitcase, both inside and out. In the rare event of lost luggage, this visual record can be incredibly helpful for airline staff in locating your belongings.
Pro tip: Use a smart luggage tag with a QR code or GPS tracker. These modern solutions offer an extra layer of security and peace of mind, allowing you to track your bag’s location should it go astray, turning potential stress into a minor inconvenience.
Common Mistakes to Avoid
Even the most seasoned travelers can fall prey to common packing pitfalls. Awareness is your first line of defense against these travel woes:
-
Overpacking: The Burden of “Just in Case”
Why it’s problematic: This is the most common mistake. An overstuffed suitcase is heavy, difficult to maneuver, and often results in excess baggage fees. It also means you spend more time managing your belongings and less time immersing yourself in your destination. The “just in case” mentality often leads to bringing items you never use, taking up valuable space that could be used for souvenirs or simply for lighter travel.
Correct approach: Embrace minimalism. Lay out everything you think you need, then remove at least 20-30%. Focus on versatile, multi-purpose items and a cohesive color palette. Remember, most places have laundry facilities or shops where you can purchase forgotten essentials.
-
Ignoring Weather and Cultural Nuances
Why it’s problematic: Showing up to a snowy mountain town with only light jackets or attempting to enter a sacred temple in shorts and a tank top can lead to discomfort, disrespect, or even being denied entry. Not researching these vital details can significantly detract from your experience.
Correct approach: Research your destination’s climate for your travel dates (not just the season) and understand local customs regarding attire. Pack layers for fluctuating temperatures and include modest clothing options if visiting cultural or religious sites.
-
Poor Organization: The Suitcase Scramble
Why it’s problematic: A chaotic suitcase where items are just thrown in haphazardly leads to wasted space, wrinkled clothes, and endless rummaging. You’ll waste precious travel time digging for items, and your belongings will likely get damaged or dirtied.
Correct approach: Utilize packing cubes, garment bags, and shoe bags. Group similar items together. Place heavy items at the bottom near the wheels and delicate items on top. A well-organized bag saves time, reduces stress, and protects your belongings.
-
Forgetting Essential Documents and Medications
Why it’s problematic: Leaving behind your passport, essential visas, critical medications, or travel insurance details can derail your trip before it even begins. Some items are impossible to replace quickly or safely while abroad.
Correct approach: Create a dedicated “Travel Documents” folder or pouch. Keep all critical papers, including copies, in your carry-on. Pack all prescription medications in their original containers in your carry-on, along with a doctor’s note if necessary. Double-check these items before leaving home.
-
Leaving No Room for Souvenirs
Why it’s problematic: Arriving home with a suitcase bursting at the seams, forcing you to buy an extra bag or discard items, is a common frustration. It means you couldn’t fully embrace the joy of bringing home unique local treasures.
Correct approach: Intentionally leave about 10-15% of your suitcase empty. This provides a buffer for spontaneous purchases, gifts, or even just some extra space for dirty laundry. Alternatively, pack a lightweight, foldable duffel bag that can serve as an overflow bag for souvenirs.
Troubleshooting
Even with the best intentions, packing can present a few unexpected challenges:
-
“My Suitcase Won’t Close!”
Quick solution: This is the ultimate sign of overpacking. Don’t force it – you risk damaging the zipper or the bag itself. Go back to Step 2: Curate Your Wardrobe’s Narrative. Lay everything out again. What can truly be left behind? Are there any duplicate items? Can you wear your bulkiest shoes and jacket? Be ruthless. If you absolutely cannot remove anything, consider mailing some non-essential items home or investing in a vacuum-seal bag for compressible clothes (though be mindful of weight limits).
-
“My Clothes Are Still Wrinkled!”
Quick solution: Despite careful rolling, some fabrics are simply prone to wrinkling. Upon arrival, immediately hang up all your clothes. Many hotels provide irons or steamers. If not, hang wrinkled items in the bathroom while you take a hot shower; the steam can help relax the fabric. For stubborn creases, a travel-sized wrinkle release spray can work wonders. Remember, linen and cotton are prone to wrinkles – embrace it as part of their charm!
-
“I Forgot Something Important!”
Quick solution: First, don’t panic! Most forgotten items (like a toothbrush, phone charger, or specific toiletries) can be purchased at your destination. For more critical items like medication, contact your doctor or pharmacy for advice on refills or alternatives. For non-essential items, consider if you truly need it or if you can improvise with what you have. Sometimes, forgetting something leads to discovering a local gem or a creative solution!
Key Takeaways
- Plan with Purpose: Envision your trip to guide your packing choices, aligning items with experiences and cultural context.
- Curate, Don’t Just Collect: Select versatile, interchangeable clothing that tells a cohesive story and maximizes outfit options.
- Master the Methods: Utilize rolling for soft items and careful folding/bundling for delicate pieces to save space and minimize wrinkles.
- Embrace Organization: Packing cubes are your allies for tidiness, compression, and easy access to your belongings.
- Nestle with Care: Place heavy items at the bottom, fill gaps, and protect shoes and liquids to ensure a stable, secure suitcase.
- Prioritize Your Carry-On: Keep all essentials, valuables, and documents with you, creating a buffer against unforeseen travel hiccups.
- Pack Light, Travel Far: Ruthlessly edit your items, leaving room for spontaneity, souvenirs, and a more unburdened journey.
Frequently Asked Questions
Q: Is rolling or folding better for clothes?
A: Both methods have their merits. Rolling is generally better for soft, unstructured items like t-shirts, jeans, and casual dresses, as it saves space and reduces wrinkles by distributing creases. Folding is preferable for more structured garments like blazers, dress shirts, or delicate fabrics where sharp creases need to be avoided. A combination of both methods often yields the best results.
Q: How can I prevent my clothes from wrinkling?
A: Several strategies help: use the rolling method for most items; interleave delicate folded items with tissue paper; choose wrinkle-resistant fabrics (e.g., merino wool, synthetic blends); use garment bags for suits or dresses; and upon arrival, immediately hang your clothes or use a hotel iron/steamer or the steam from a hot shower.
Q: What’s the best way to pack shoes?
A: Always place shoes in individual dust bags, old pillowcases, or plastic bags to prevent dirt from transferring to your clothes. Pack them at the bottom of your suitcase, ideally near the wheels, to maintain stability. Maximize space by stuffing socks, underwear, or small accessories into the shoes themselves.
Q: What absolutely must go in my carry-on bag?
A: Your carry-on should be your survival kit. It must contain all travel documents (passport, tickets, visas), prescription medications (in original containers), valuables (jewelry, electronics, camera), a full change of clothes, and any items you cannot replace or live without for 24-48 hours. Don’t forget chargers, a power bank, and anything for in-flight comfort like a book or headphones.
What’s Next?
With your suitcase packed with intention and care, the world awaits! But the journey doesn’t end at the zipper. Now, the real adventure begins:
- Dive Deeper into Your Destination: Research local etiquette, learn a few key phrases in the local language, and discover hidden gems not found in guidebooks.
- Plan Your First Day: Having a loose plan for your arrival day can alleviate stress, allowing you to settle in and immediately begin soaking up the atmosphere.
- Embrace Spontaneity: While planning is good, leave room for the unexpected. The most memorable travel moments often happen when you deviate from the itinerary and follow a local’s recommendation or a sudden impulse.
- Share Your Story: Start a travel journal, practice your photography skills, or simply commit to truly being present. These are the ways you’ll collect your stories and bring them home.
Your perfectly packed suitcase is more than just luggage; it’s a vessel carrying your dreams, your curiosity, and your readiness to connect with the world. Take a deep breath, feel the excitement bubble up, and step out with confidence. The adventure of a lifetime is calling – go answer it!