🚗 How To Pack A Cooler For A Road Trip
✈️ The Smart Traveler's Toolkit
Whether you're heading to the beaches of Thailand or exploring cobblestone streets in Prague, these are the 5 travel essentials that seasoned globetrotters and travel editors universally recommend — the gear that makes every trip smoother, lighter, and more enjoyable.
🧳 Away The Carry-On Hard Shell Suitcase
The single most recommended carry-on in the travel world right now. Travel editors and frequent flyers rely on its durable polycarbonate shell, 360° spinner wheels, and built-in compression system to maximize packing space while gliding effortlessly through any airport terminal.
🎒 Osprey Daylite Plus Daypack
The go-to daypack that professional travel bloggers and adventure guides swear by for city explorations and shore excursions. Its lightweight, breathable mesh back panel keeps you cool in tropical heat, while the 20L capacity fits everything you need — camera, water bottle, sunscreen, and souvenirs — without weighing you down.
📦 Eagle Creek Pack-It Reveal Cube Set
The packing organization system that experts credit with fitting 30% more into any suitcase. These translucent, color-coded cubes separate tops, bottoms, and accessories so you spend zero time digging through your bag — universally recommended by professional packers and minimalist travel coaches worldwide.
🎧 Sony WH-1000XM5 Noise-Cancelling Headphones
The undisputed king of travel headphones that flight attendants and business travelers universally recommend. The industry-leading noise cancellation erases engine roar, crying babies, and airport chaos — giving you 30 hours of blissful silence for long-haul flights, road trips, and train journeys.
🔋 Anker PowerCore 26800 Portable Charger
The portable power bank that travel photographers and digital nomads rely on to keep devices charged through full-day excursions without hunting for outlets. With enough capacity to charge a phone 6+ times over, it's the non-negotiable lifeline for capturing every sunset, navigating unfamiliar cities, and staying connected abroad.
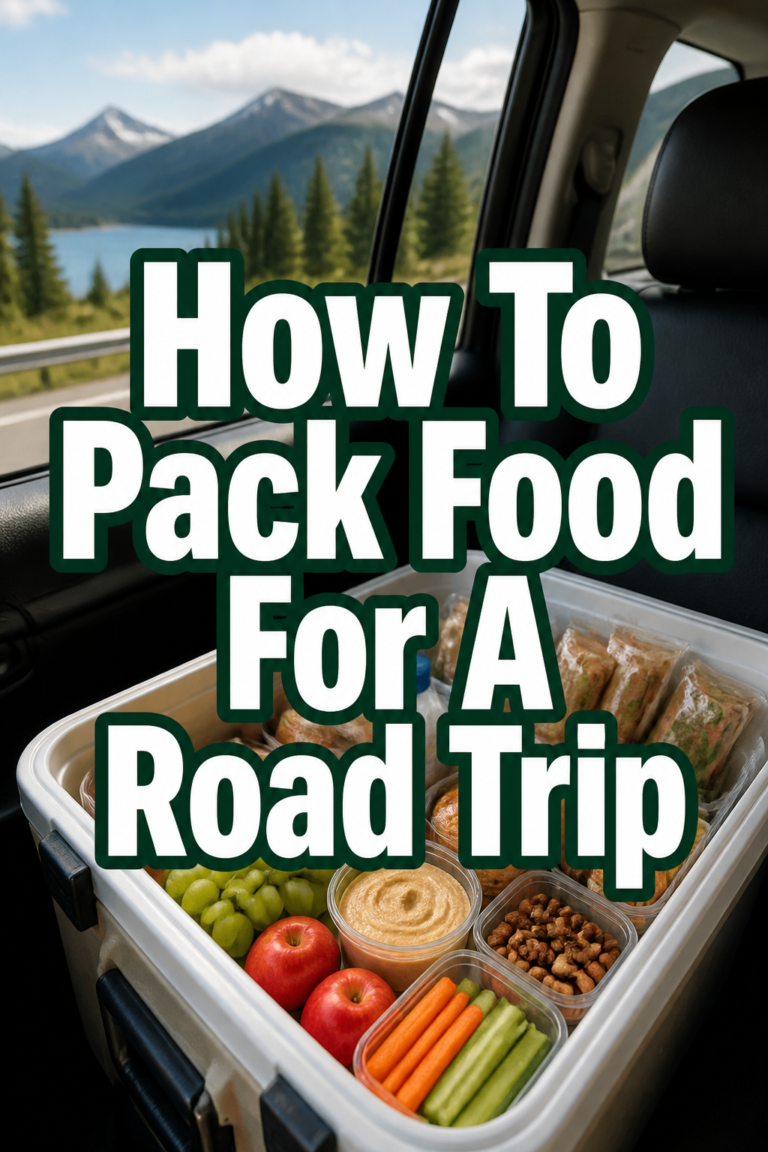
There’s a unique magic to the open road, a sense of boundless possibility stretching before you. I still remember discovering that hidden waterfall in the Rockies, pulling out a perfectly chilled sandwich, and feeling utterly content.
That moment of simple joy, fueled by a well-packed cooler, transforms a good trip into an unforgettable adventure. This guide will show you how to master that essential road trip skill.

Quick Overview
Transform your travel experience by packing a cooler that keeps provisions fresh, delicious, and ready for any spontaneous stop. You’ll learn the art of layering, temperature control, and smart food choices, freeing you to explore.
- Time needed: 45-60 minutes (including shopping and prep)
- Difficulty: Beginner
- What you’ll need: A good cooler, ice/ice packs, food, drinks, sturdy containers, a plan
Step-by-Step Instructions
Step 1: Choose Your Vessel Wisely
The foundation of any great cooler packing strategy begins with the cooler itself. Not all coolers are created equal; a well-insulated model makes all the difference in preserving your precious cargo. Consider its size, matching it to the length of your journey and the number of travelers.
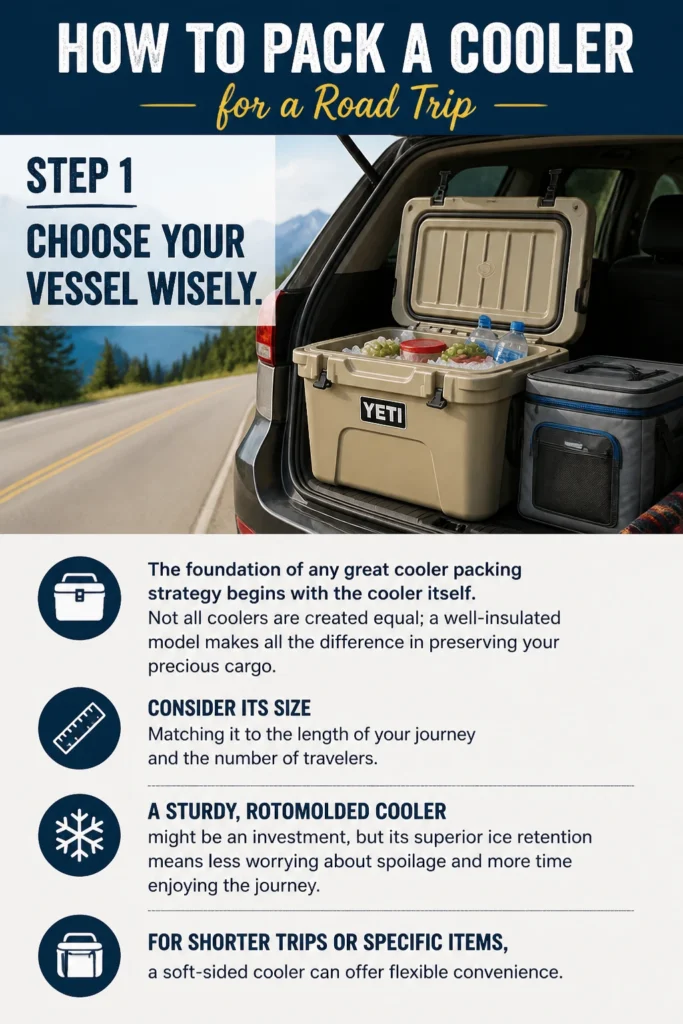
A sturdy, rotomolded cooler might be an investment, but its superior ice retention means less worrying about spoilage and more time enjoying the journey. For shorter trips or specific items, a soft-sided cooler can offer flexible convenience.
Step 2: Pre-Chill for Peak Performance
This often-overlooked step is absolutely critical for maintaining ideal temperatures throughout your trip. A warm cooler will rapidly melt ice, regardless of its quality, wasting its chilling power.
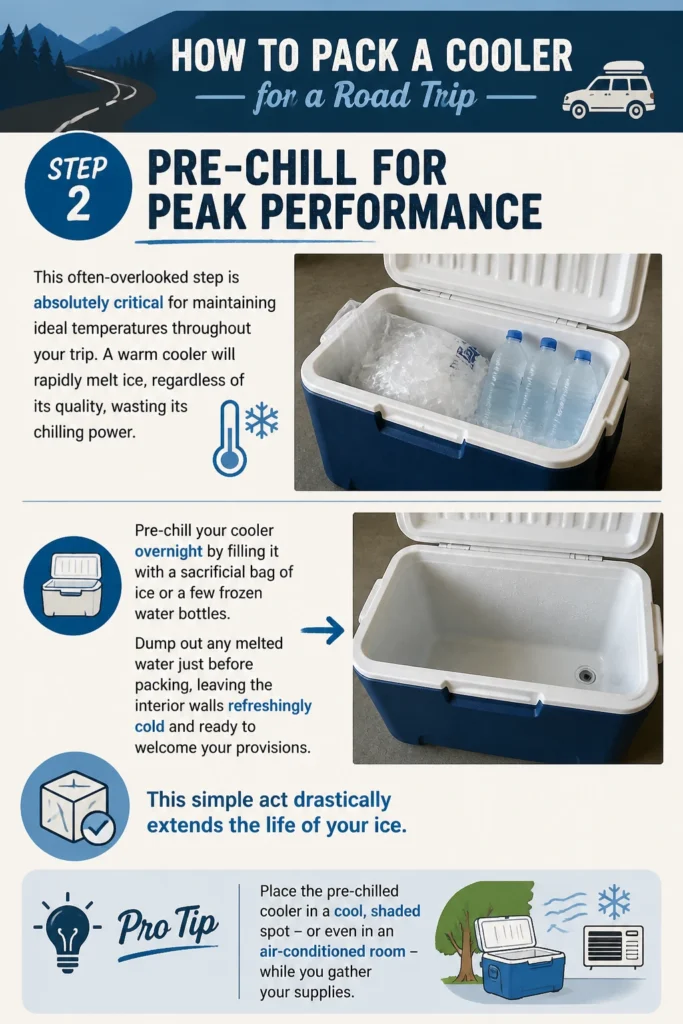
Pre-chill your cooler overnight by filling it with a sacrificial bag of ice or a few frozen water bottles. Dump out any melted water just before packing, leaving the interior walls refreshingly cold and ready to welcome your provisions. This simple act drastically extends the life of your ice.
Pro Tip: Place the pre-chilled cooler in a cool, shaded spot – or even in an air-conditioned room – while you gather your supplies. This prevents it from warming up again before you even begin packing.
Step 3: Strategize Your Ice and Ice Packs
Ice is the lifeblood of your cooler, but how you use it matters immensely. A combination of block ice, cubed ice, and reusable ice packs offers the best results for sustained cooling.
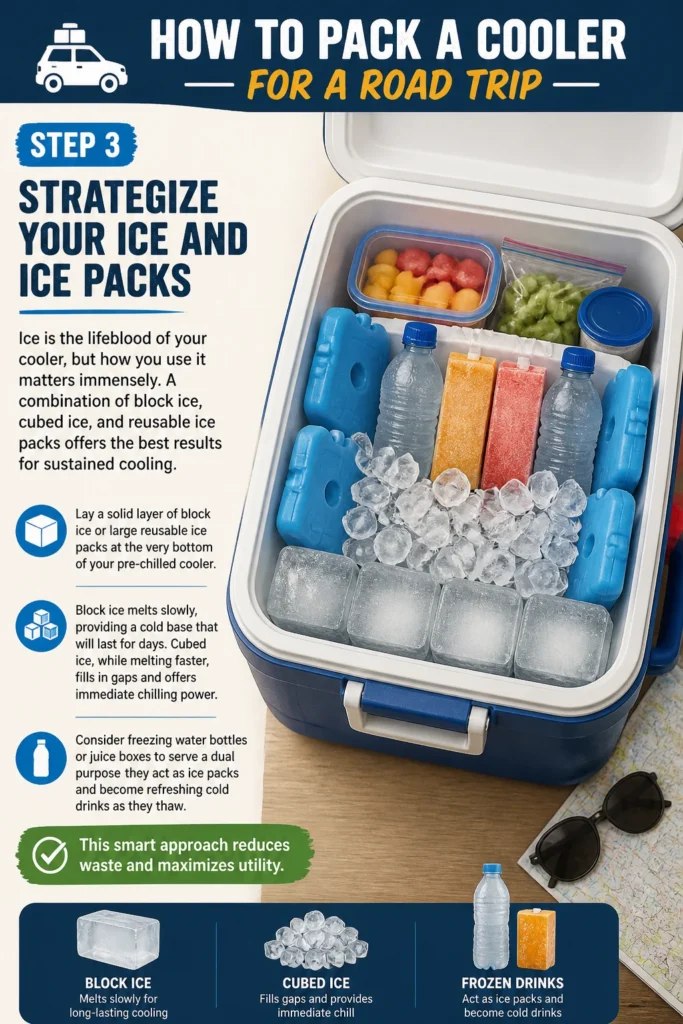
Lay a solid layer of block ice or large reusable ice packs at the very bottom of your pre-chilled cooler. Block ice melts slowly, providing a cold base that will last for days. Cubed ice, while melting faster, fills in gaps and offers immediate chilling power.
Consider freezing water bottles or juice boxes to serve a dual purpose: they act as ice packs and become refreshing cold drinks as they thaw. This smart approach reduces waste and maximizes utility.
Step 4: Pack Smart with Layers and Logic
The art of cooler packing is all about strategic layering, ensuring that items you need first are easily accessible and delicate foods are protected. Think of your cooler as a carefully constructed culinary ecosystem.
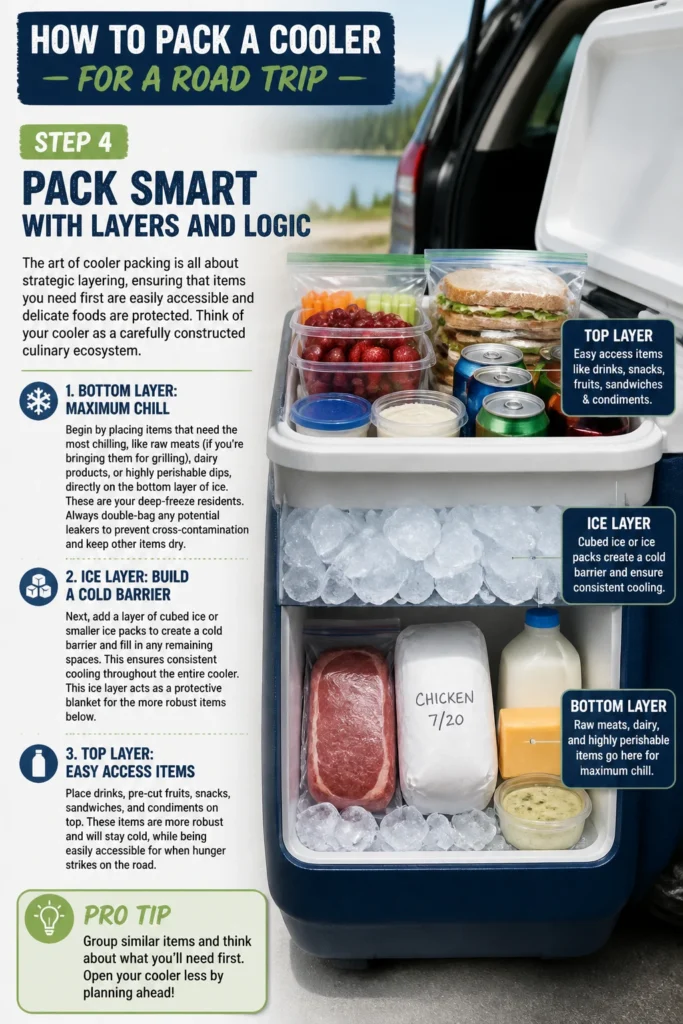
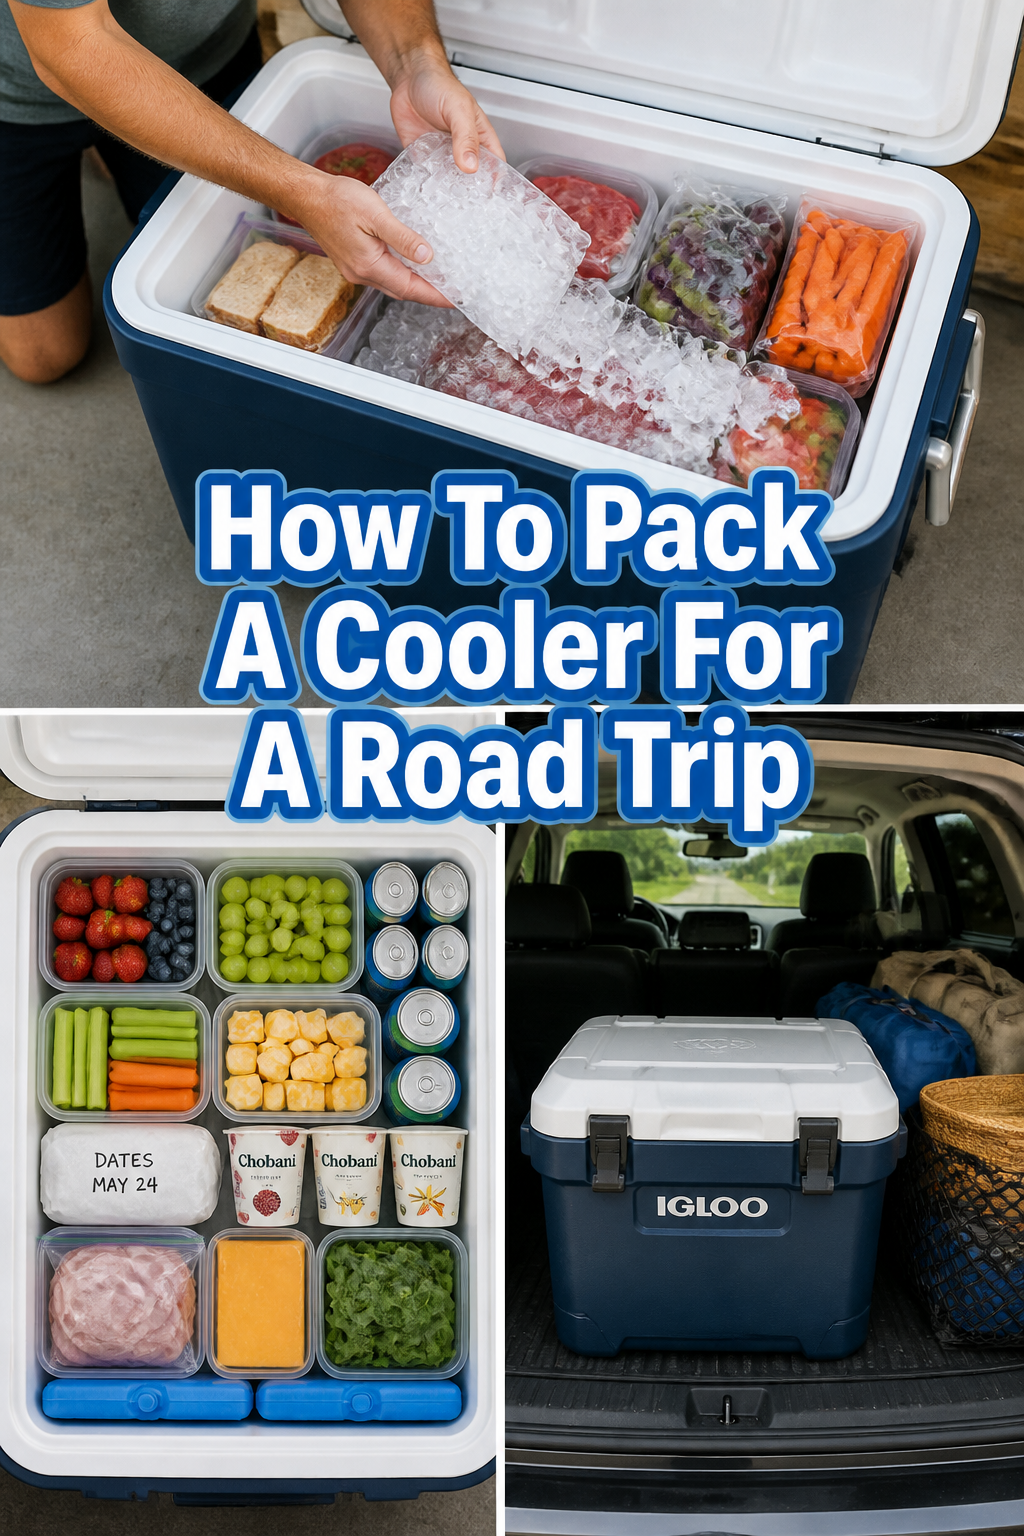
Begin by placing items that need the most chilling, like raw meats (if you’re bringing them for grilling), dairy products, or highly perishable dips, directly on the bottom layer of ice. These are your deep-freeze residents. Always double-bag any potential leakers to prevent cross-contamination and keep other items dry.
Next, add a layer of cubed ice or smaller ice packs to create a cold barrier and fill in any remaining spaces. This ensures consistent cooling throughout the entire cooler. This ice layer acts as a protective blanket for the more robust items below.
Pro Tip: Group similar items together. Designate one side for drinks and the other for food. This makes finding what you need much faster, reducing the time the lid stays open and warm air rushes in.
Step 5: Prioritize Accessibility and Protection
With your base layers secure, it’s time to consider the mid-section and top of your cooler. These layers are for items you’ll reach for more frequently and those that are more susceptible to crushing.
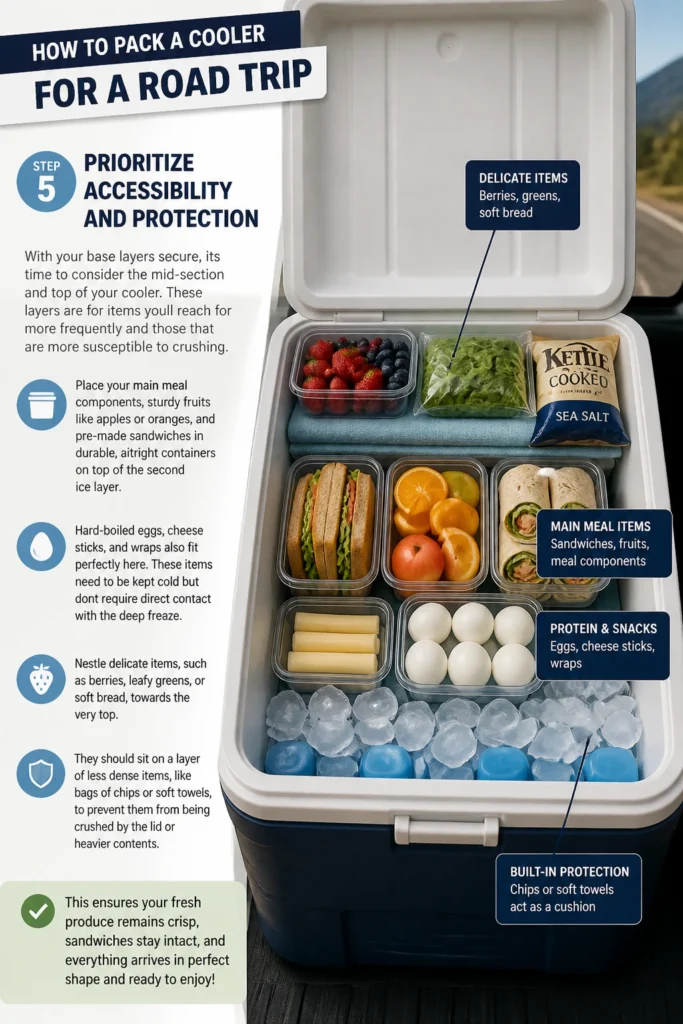
Place your main meal components, sturdy fruits like apples or oranges, and pre-made sandwiches in durable, airtight containers on top of the second ice layer. Hard-boiled eggs, cheese sticks, and wraps also fit perfectly here. These items need to be kept cold but don’t require direct contact with the deep freeze.
Nestle delicate items, such as berries, leafy greens, or soft bread, towards the very top. They should sit on a layer of less dense items, like bags of chips or soft towels, to prevent them from being crushed by the lid or heavier contents. This ensures your fresh produce remains pristine.
Step 6: Don’t Forget the Drinks and Snacks
Hydration is key on any road trip, and a well-stocked drink selection can make a huge difference to your comfort and mood. Roadside stops often mean overpriced beverages.
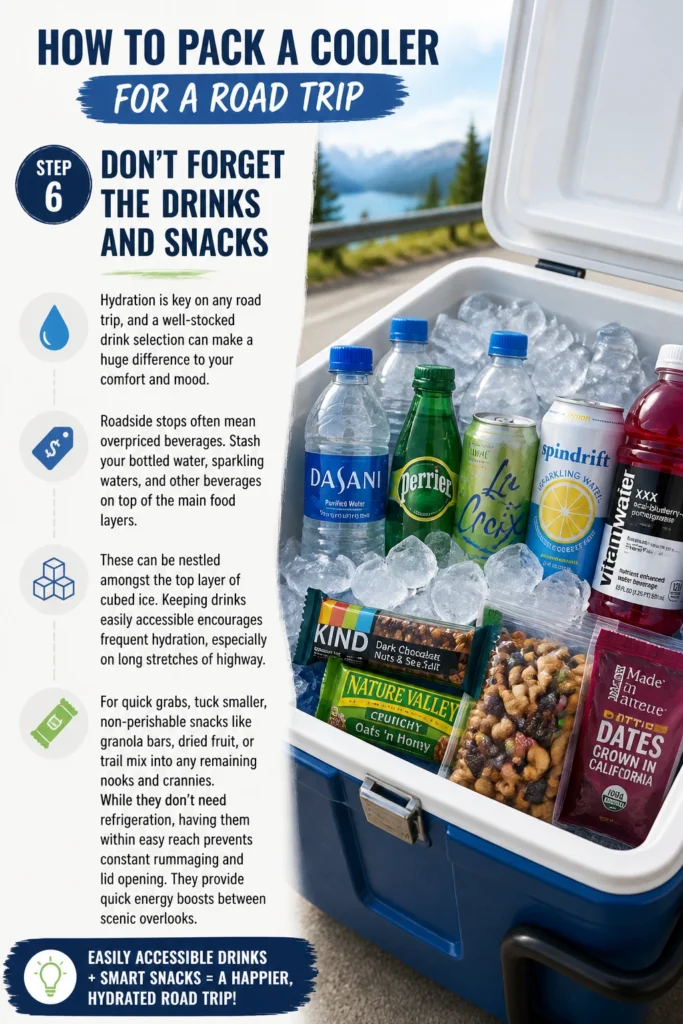
Stash your bottled water, sparkling waters, and other beverages on top of the main food layers. These can be nestled amongst the top layer of cubed ice. Keeping drinks easily accessible encourages frequent hydration, especially on long stretches of highway.
For quick grabs, tuck smaller, non-perishable snacks like granola bars, dried fruit, or trail mix into any remaining nooks and crannies. While they don’t need refrigeration, having them within easy reach prevents constant rummaging and lid opening. They provide quick energy boosts between scenic overlooks.
Step 7: Master the Art of the Final Seal
Once everything is meticulously placed, the final step is crucial for locking in the cold and maximizing ice retention. A poorly sealed cooler is a rapidly warming cooler.
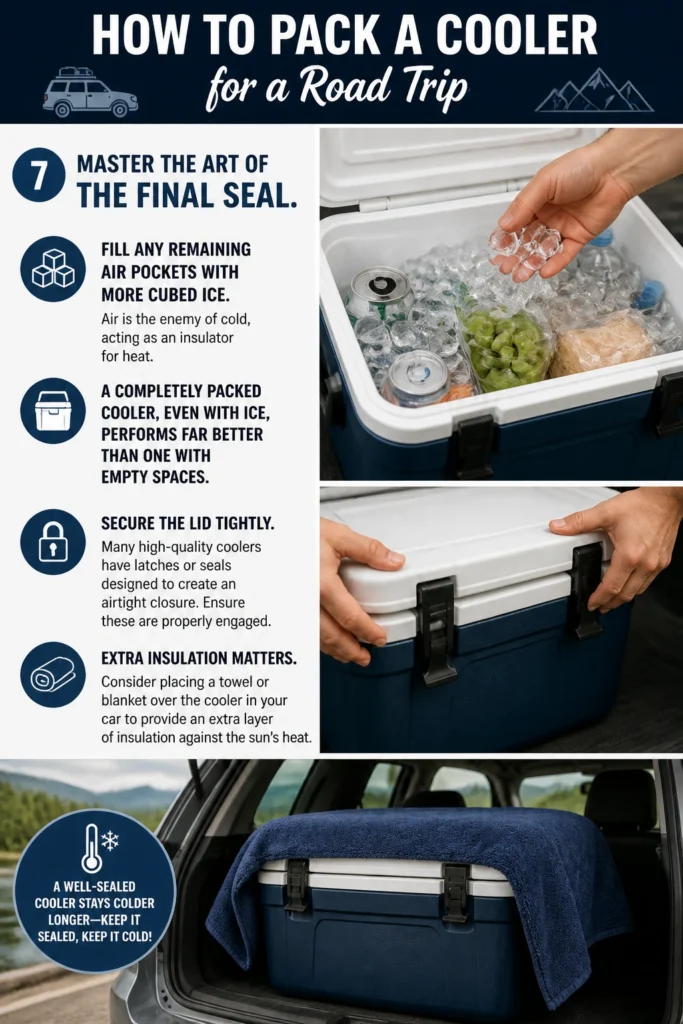
Fill any remaining air pockets with more cubed ice. Air is the enemy of cold, acting as an insulator for heat. A completely packed cooler, even with ice, performs far better than one with empty spaces.
Finally, secure the lid tightly. Many high-quality coolers have latches or seals designed to create an airtight closure. Ensure these are properly engaged. Consider placing a towel or blanket over the cooler in your car to provide an extra layer of insulation against the sun’s heat.
Step 8: Location, Location, Location (in the Car)
Where you place your cooler in the vehicle can significantly impact its performance. A little foresight here goes a long way in keeping things chilled.

Position your cooler away from direct sunlight whenever possible. The trunk of a car can become an oven on a sunny day, rapidly diminishing your ice supply. If the trunk is your only option, ensure it’s covered.
The floor of the back seat, especially if it’s shaded, often provides a cooler environment. If you’re making frequent stops, having it accessible without fully unpacking the car is a bonus.
Common Mistakes to Avoid
Forgetting to Pre-Chill
This is perhaps the most common and damaging mistake. Loading a warm cooler with cold food and ice is like putting ice cubes into a hot drink; they’ll melt instantly. Your ice will be gone in hours, leaving you with lukewarm provisions and disappointment. Always pre-chill to give your ice a fighting chance.
Packing a Loose, Airy Cooler
Air is a poor insulator for cold. A cooler with lots of empty space allows warm air pockets to form and circulate, quickly melting your ice. This leads to inefficient cooling and a shorter lifespan for your ice. Pack it tight, fill gaps with ice or towels, and eliminate air.
Mixing Raw Meats and Ready-to-Eat Foods Carelessly
Cross-contamination is a serious health risk, especially on the road where handwashing facilities might be limited. Placing raw chicken directly next to your pre-made sandwiches without proper sealing is an invitation for trouble. Always double-bag raw meats and keep them separate and at the very bottom of the cooler.
Opening the Cooler Too Frequently
Every time you open the cooler, warm air rushes in, and cold air escapes. This constant exchange rapidly depletes your ice supply and warms your food. Plan your access, retrieve multiple items at once, and close the lid quickly and securely. Consider a separate small cooler for frequently accessed drinks.
Troubleshooting
Ice Melting Too Quickly
If your ice is turning to water faster than expected, revisit your pre-chilling routine. An un-chilled cooler is the primary culprit. Also, check for air pockets; a loosely packed cooler with lots of empty space will melt ice faster. Ensure your cooler lid is sealing properly and that it’s not sitting in direct sunlight.
Food Getting Soggy
Soggy food usually indicates a leak or condensation issue. Double-check that all your food containers are airtight and leak-proof. Placing a layer of plastic wrap or a dry towel on top of your food items before the final ice layer can also help absorb excess moisture and protect delicate items.
Can’t Find Anything!
A disorganized cooler is a frustrating cooler. If you’re constantly rummaging, it’s a sign you need better organization. Try implementing the layering strategy more strictly, with frequently accessed items on top and less-used items at the bottom. Consider using clear, stackable containers to easily see contents.
Key Takeaways
- Pre-chill your cooler thoroughly before packing to maximize ice retention.
- Layer ice effectively, starting with block ice at the bottom for long-lasting cold.
- Organize items by frequency of use and fragility, with frequently accessed items on top.
- Pack tightly to eliminate air pockets, which are detrimental to maintaining cold temperatures.
- Prevent cross-contamination by securely bagging raw meats and keeping them separate.
- Limit lid openings to preserve cold air and extend the life of your ice.
Frequently Asked Questions
Can I use dry ice in my cooler?
Yes, dry ice is incredibly effective for keeping items frozen for extended periods, making it ideal for multi-day trips. However, it requires careful handling (wear gloves!) and should be placed at the bottom, wrapped, and separated from items you don’t want completely frozen. Ensure your cooler is designed to handle dry ice, as some might crack under extreme cold.
How do I keep my sandwiches from getting squished?
Invest in sturdy, hard-sided sandwich containers. These protect your delicate creations from the weight of other items and the pressure of the cooler lid. Pack them towards the top of your food layers, on top of more robust items.
What’s the best way to clean my cooler after a trip?
After each adventure, empty your cooler completely. Wash it with warm, soapy water, using a sponge or brush to get into corners. For stubborn odors, a solution of baking soda and water works wonders. Rinse thoroughly, then leave the lid ajar to air dry completely, preventing mold and mildew growth.
Our Top Recommended Finds
- High-Performance Rotomolded Cooler: Offers exceptional insulation and durability, keeping ice for days, perfect for extended journeys to remote landscapes.
- Stackable, Leak-Proof Food Containers: Essential for organized packing, preventing spills and keeping your precious meals fresh and dry.
- Reusable Freezer Packs: A sustainable alternative to bagged ice, these packs don’t make a mess as they thaw and can be refrozen for countless adventures.
Embark on Your Next Culinary Journey
Imagine the freedom: pulling off onto a dusty track leading to a hidden vista, the scent of pine in the air, knowing a perfectly chilled picnic awaits. Packing a cooler isn’t just about food; it’s about unlocking those spontaneous moments of pure joy. It’s about savoring local flavors discovered at a roadside stand, or enjoying a sunrise coffee overlooking a breathtaking canyon, all without compromise.
This simple preparation empowers you to chase sun-drenched horizons and discover charming small towns at your own pace. So, gather your provisions, embrace the open road, and let your perfectly packed cooler be your passport to unforgettable tastes and treasured memories. What delicious adventure will you pack for next?